How to Optimize a Framer Website for SEO, Step-by-Step

Slava Burian
How to
19 min read


Most Framer tutorials just tell you to add a meta title and stop there. That's not SEO — that's filling in a form.
Real Framer SEO means making sure Google can find your pages, understand what they're about, and rank them correctly. It means setting up your CMS collection pages properly, not just your homepage. It means submitting a sitemap, checking your Core Web Vitals, and knowing where to drop custom code when the UI doesn't cover your needs.
This guide walks you through all of it — in the order that actually makes sense. No generic SEO advice that applies to every platform. Everything here is specific to how Framer works.
By the end, you'll have a complete SEO setup you can apply to any Framer project, whether it's a portfolio, a SaaS landing page, or a content-heavy blog.
Does Framer Support SEO Natively?
The short answer: yes, more than most people realize.
Framer isn't WordPress, but it's not a black box either. It gives you a solid SEO foundation out of the box — and fills in the gaps with a custom code field that lets you do almost anything you'd do on any other platform.
What Framer Handles Automatically
When you publish a Framer site, several SEO-relevant things happen without any configuration from you.
Framer generates a sitemap.xml automatically. Every published page shows up there, including CMS collection pages. Google can find and crawl your site structure without you doing anything extra.
Framer also renders pages server-side by default. This matters because Google's crawler reads HTML, not JavaScript. Unlike some React-based builders that send an empty HTML shell to the browser, Framer delivers pre-rendered content — which means your text, headings, and links are visible to search engines immediately.
On top of that, Framer hosts your site on a global CDN with HTTPS enabled. Both of these are baseline SEO requirements that Framer handles for you.
What You Need to Configure Manually
The automatic stuff gets you crawlable and indexed. But it won't get you ranked.
For that, you need to manually set meta titles and descriptions — for every page, including CMS pages. You need to connect your site to Google Search Console so you can monitor indexing and performance. You need to make sure your CMS collection pages have dynamic, unique meta fields instead of the same title on every post.
You also need to handle structured data yourself. Framer doesn't generate schema markup automatically — if you want rich results in Google (like article dates, author names, or FAQ dropdowns), you'll need to add JSON-LD via the custom code field.
Think of Framer's native SEO as a clean foundation. It gives you everything you need to build on — but the actual optimization is still your job.
Redirects and staging — both relevant for SEO — are only available on Pro and above. See our Framer pricing guide before choosing a plan.
Semantic HTML — Tag Your Elements Correctly
Framer gives every element a default tag of div. A div has no meaning to a search engine. It's just a box. Assigning the right HTML tags tells Google what each part of your page actually is — and that context matters for rankings.
In Framer, select any frame or text element and look for the Tag property in the right panel. Change it from div to the correct semantic tag:
Navigation bar →
<nav>Page footer →
<footer>Blog post body →
<article>Grouped content sections →
<section>Main page content area →
<main>
Your headings need the same attention. Don't choose a font size because it looks right — assign the correct tag. Every page should have exactly one <h1>. Subheadings should follow a logical hierarchy: <h2> for main sections, <h3> for subsections within them.
Google's crawlers don't see your animations or gradients. They read the code. A page with clean semantic structure is easier to crawl, easier to understand, and more likely to rank than an identical page built entirely out of unstyled divs.
If you want a head start, Linie is a good example of a Framer template built with correct semantic structure from the ground up — clean heading hierarchy, proper tags, no div soup.
Semantic HTML also improves accessibility — and accessibility and SEO overlap more than most people expect. A page that works well for a screen reader is usually a page that works well for a search engine.
How to Set Up Meta Titles and Descriptions in Framer
This is the most fundamental part of Framer SEO, and it's also where most people make the same mistake: they set a meta title for the homepage and forget every other page.
Here's how to do it properly — at the site level, the page level, and inside CMS collections.
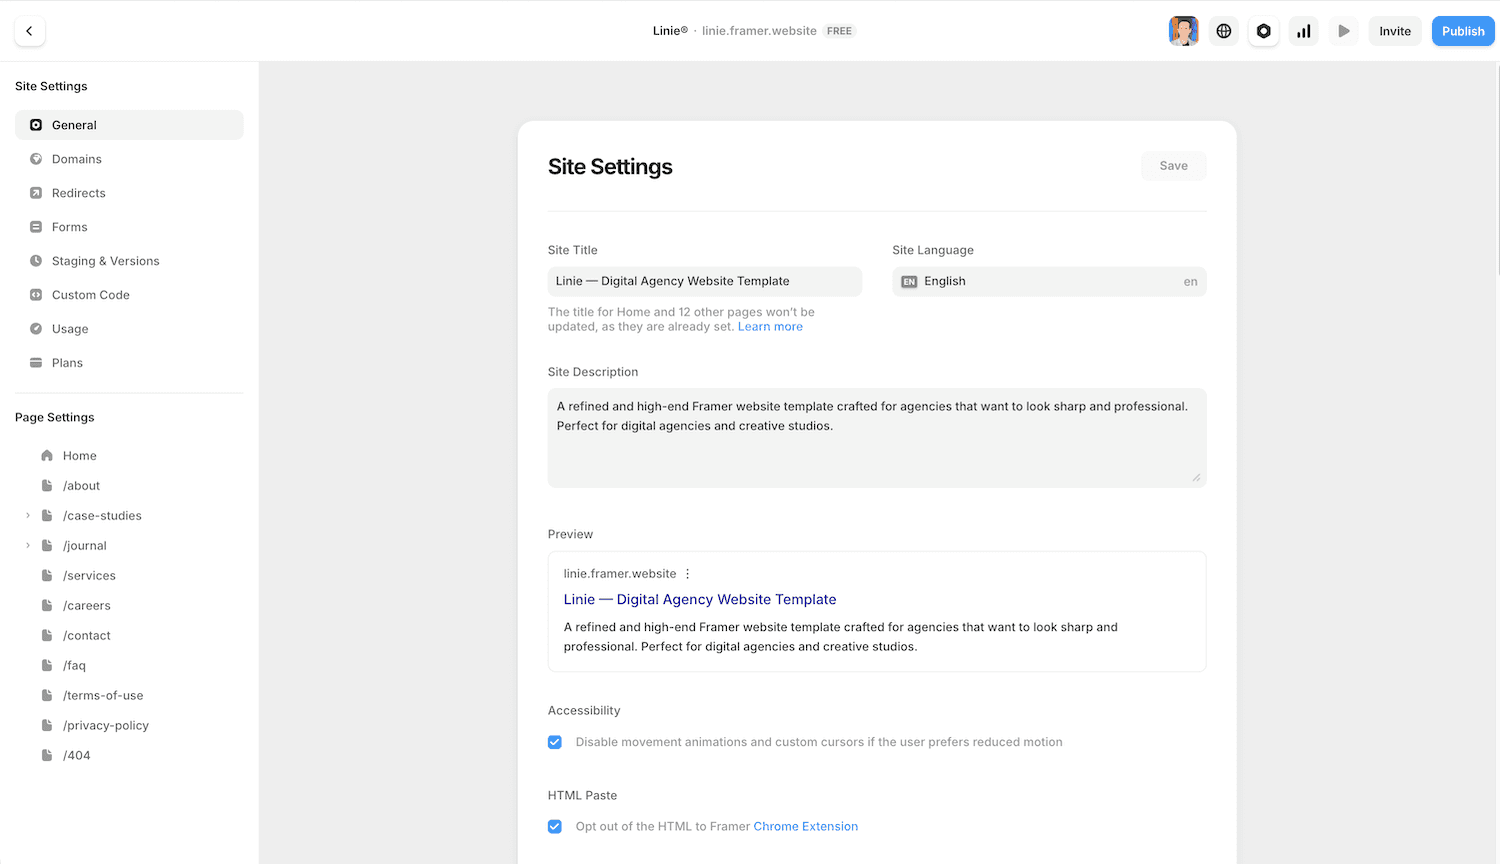
Site-Wide SEO Settings
Go to Site Settings → SEO. Here you'll find fields for your default meta title and meta description. These act as fallbacks — if a page doesn't have its own meta tags set, Framer will use these defaults.
Set these, but don't rely on them. A default meta description on every page is a duplicate content signal. It tells Google that your pages are interchangeable, which is the opposite of what you want.
Use the site-wide fields as a safety net, then override them on every page that matters.
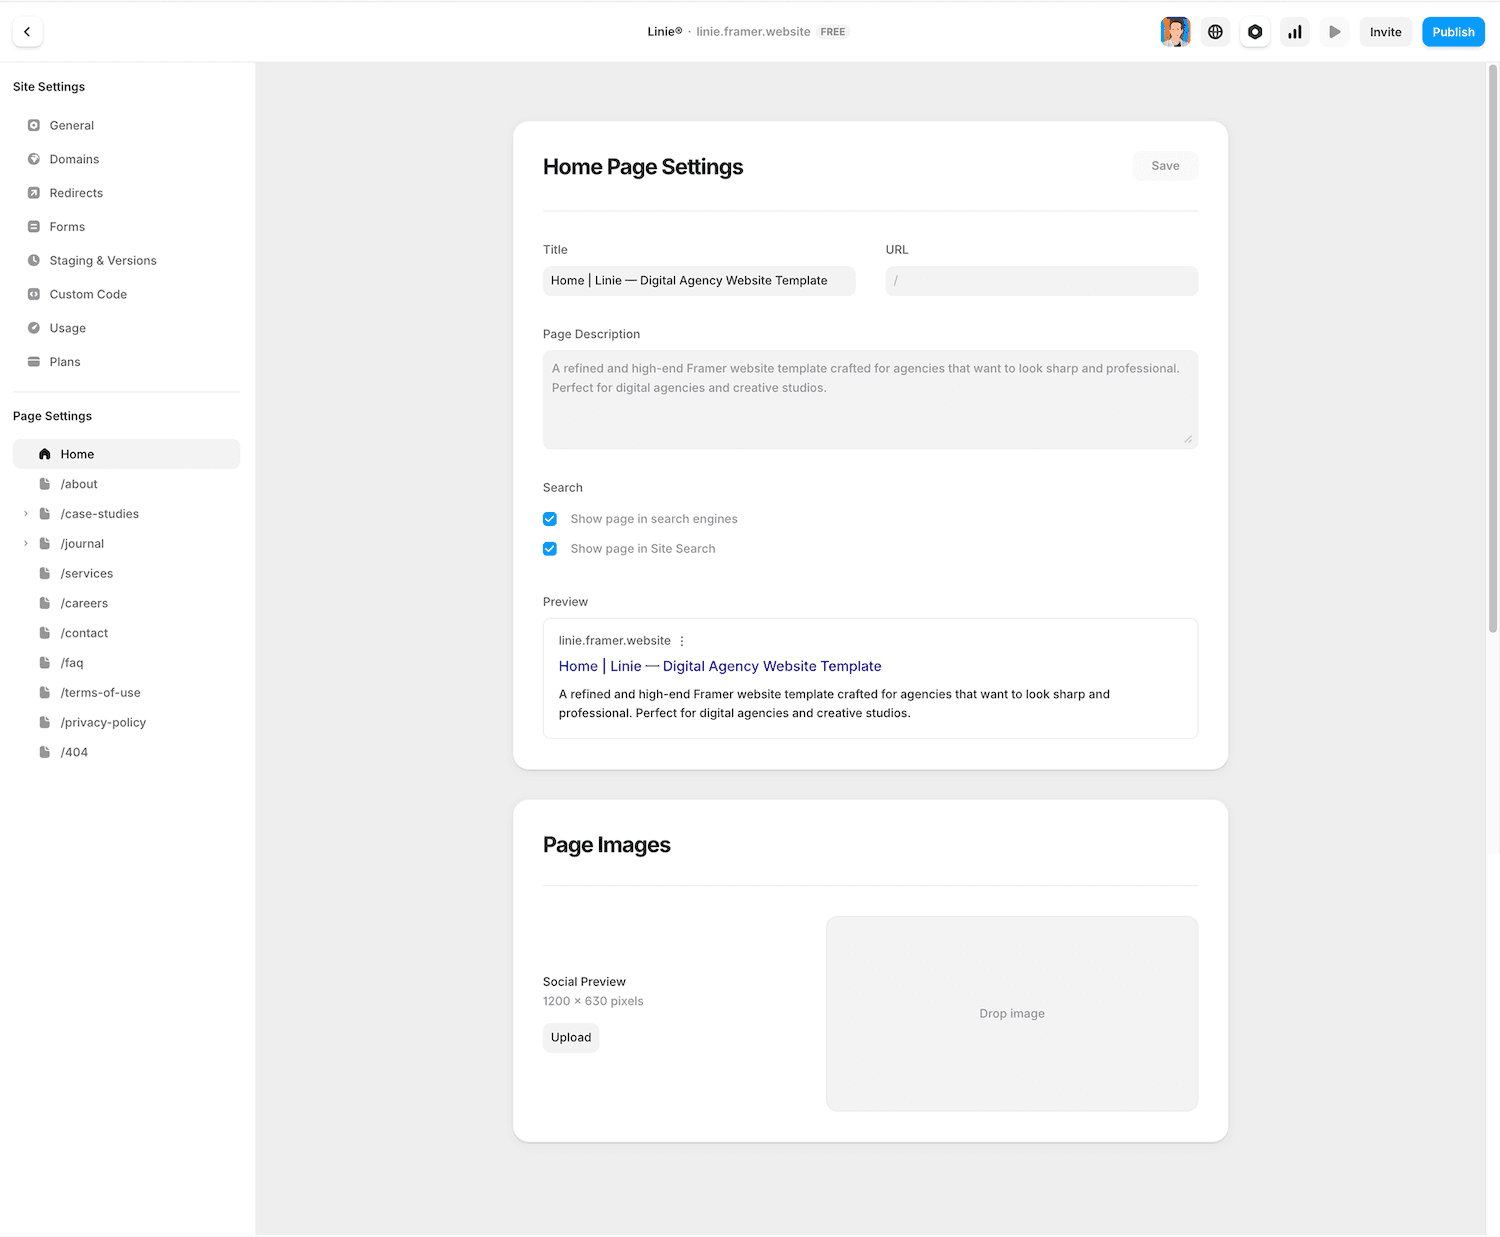
Per-Page Meta Fields
Select any page in your Framer canvas, then open the right panel and scroll to the SEO section. You will find fields for:
Title — what appears in the browser tab and Google search results
Description — the snippet shown under your title in SERPs
OG Image — the image shown when your page is shared on social media
For the title, aim for 50–60 characters. Lead with your primary keyword. Don't stuff it — write for the person reading it in search results.
For the description, stay under 155 characters. Describe what the page does and why someone should click. It doesn't directly affect rankings, but it affects click-through rate — which does.
For the OG image, use a 1200×630px image. If you skip this, social platforms will pull a random image from your page, which rarely looks good.

Meta Tags for CMS Collection Pages
This is the step most guides skip entirely.
If you have a Framer CMS collection — a blog, a case studies section, a product catalog — each collection item is its own page. And each of those pages needs its own unique meta title and description.
Open your CMS collection settings and look for the SEO fields. Instead of typing static text, you can connect these fields to CMS properties. For example:
Meta title → connect to the
Titlefield of your collection itemMeta description → connect to a custom
Meta Descriptionfield you create in the CMS
This means every blog post automatically gets a unique, relevant meta title — without you manually editing 50 pages.
If you don't do this, all your CMS pages will either have identical meta tags or none at all. Both scenarios hurt your ability to rank those pages individually.
One more thing: add a dedicated Meta Description field to your CMS schema. Don't use the article body as your meta description — it's too long and rarely optimized for search. A separate 150-character field gives your writers a place to write something intentional.
Sitemaps, Robots.txt, and Google Search Console
Getting your meta tags right is about telling Google what your pages are. This section is about making sure Google can actually find and access them.
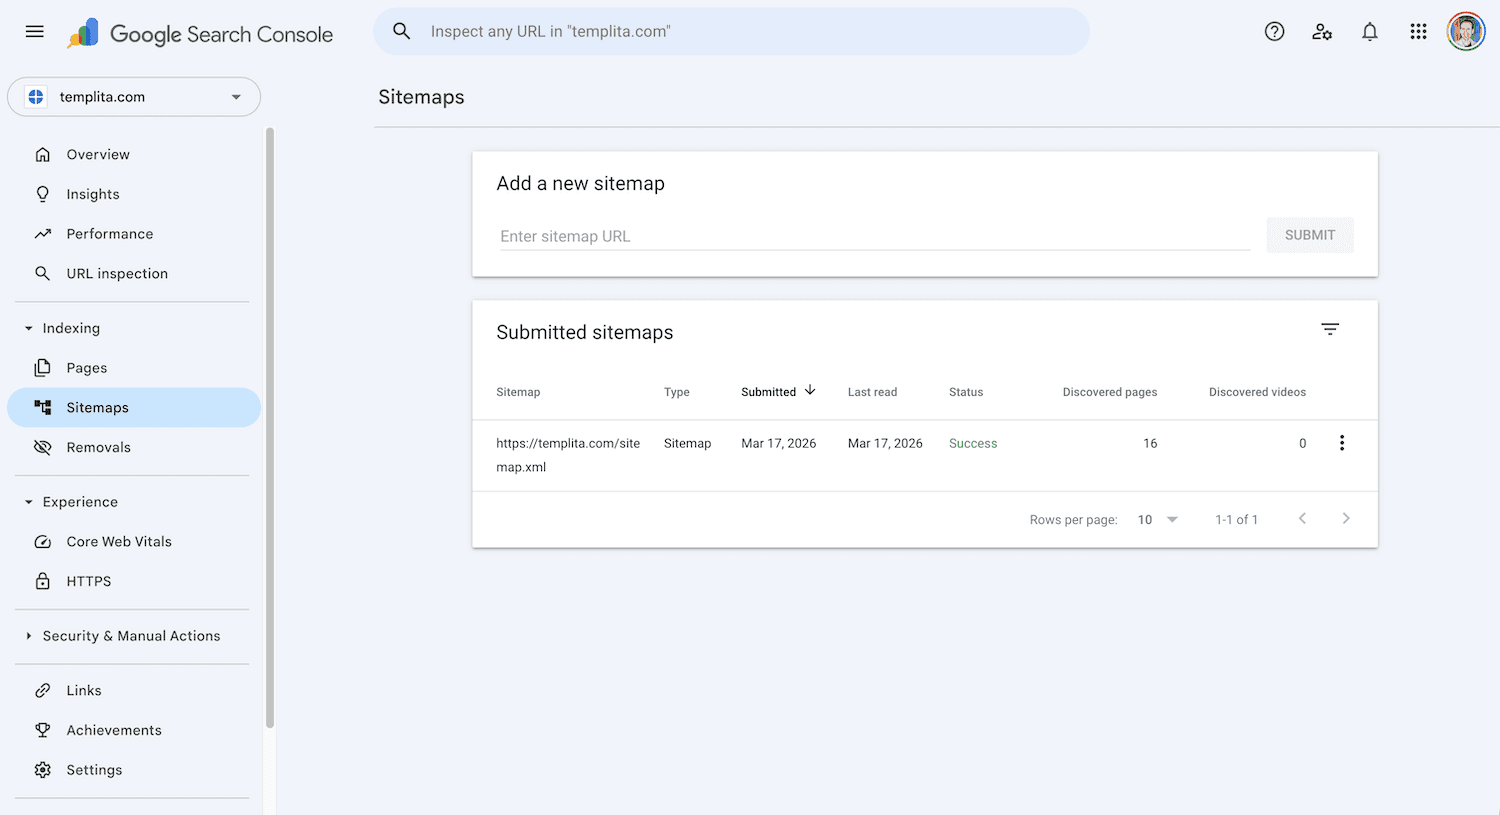
Finding and Submitting Your Framer Sitemap
Framer automatically generates a sitemap at yourdomain.com/sitemap.xml. Once your site is published on a custom domain, you can visit that URL directly to verify it's there.
The sitemap lists every published page and CMS collection item. You don't need to update it manually — Framer regenerates it whenever you publish changes.
To submit it to Google, go to Google Search Console → Sitemaps and paste the full URL: https://yourdomain.com/sitemap.xml. Google will begin crawling your pages using that map as a guide.
Submitting a sitemap doesn't guarantee immediate indexing. It tells Google where to look. How quickly pages get indexed depends on your domain's authority, how often you publish, and how well your internal linking is set up.
Verifying Your Site in Google Search Console
Before you can submit a sitemap, you need to verify ownership of your domain in GSC.
In Framer, go to Site Settings → General and look for the Custom Code or Head Code section. Google will give you a <meta> verification tag — paste it into the <head> section of your Framer site's custom code.
Alternatively, GSC supports DNS verification, which you can set up through your domain registrar without touching Framer at all. For most people, the meta tag method is faster.
Once verified, GSC becomes your most important SEO tool. You'll use it to monitor which pages are indexed, which keywords you're ranking for, and whether Google has found any crawl errors on your site.
Editing Robots.txt in Framer
Framer generates a default robots.txt automatically — it's permissive and allows all crawlers to access all pages. There's no editor for it inside the Framer UI.
If you need a custom robots.txt — to block staging paths, thank-you pages, or internal routes — the correct way to do it is through Project Settings → Well-known files. Upload your own robots.txt file there and Framer will serve it at yourdomain.com/robots.txt.
For page-level control, you don't need to touch robots.txt at all. Use the noindex meta tag instead. In Framer, go to the page settings and enable the "Hide from search engines" toggle — this adds a <meta name="robots" content="noindex"> tag to that specific page without affecting anything else.
Be deliberate about which method you use. A site-wide robots.txt blocks crawlers entirely from a path. A noindex tag lets crawlers visit the page but tells them not to include it in search results. For most Framer sites, noindex on individual pages is the safer and more precise option.
Built-in Redirects — Managing URL Changes Without Losing Rankings
Every time you rename a page slug or restructure your site, you create a broken link. If Google had that old URL indexed, it now leads to a 404. That 404 costs you whatever ranking and link equity that page had built up.
Framer handles this natively. Go to Site Settings → Redirects and add a 301 redirect from the old URL to the new one. A 301 tells Google the move is permanent — it transfers the ranking signals from the old page to the new one instead of discarding them.
The workflow is simple:
Old path:
/blog/framer-tipsNew path:
/articles/framer-seo-tipsType: 301 (Permanent)
Do this every time you change a slug. It takes 30 seconds and protects months of accumulated SEO work.
A few practical rules:
Set up redirects before you publish the new URL, not after
Don't chain redirects (A → B → C). Go directly from the old URL to the final destination
After restructuring your CMS slug format, bulk-check old URLs in Google Search Console under Coverage → Not Found (404) to catch anything you missed
How to Optimize Framer CMS Pages for SEO
Static pages are straightforward. CMS pages are where most Framer sites leave ranking potential on the table.
Every item in a Framer CMS collection — every blog post, case study, or product page — gets its own URL. That means it's a separate page in Google's index. And like any page, it needs unique, optimized content to rank.
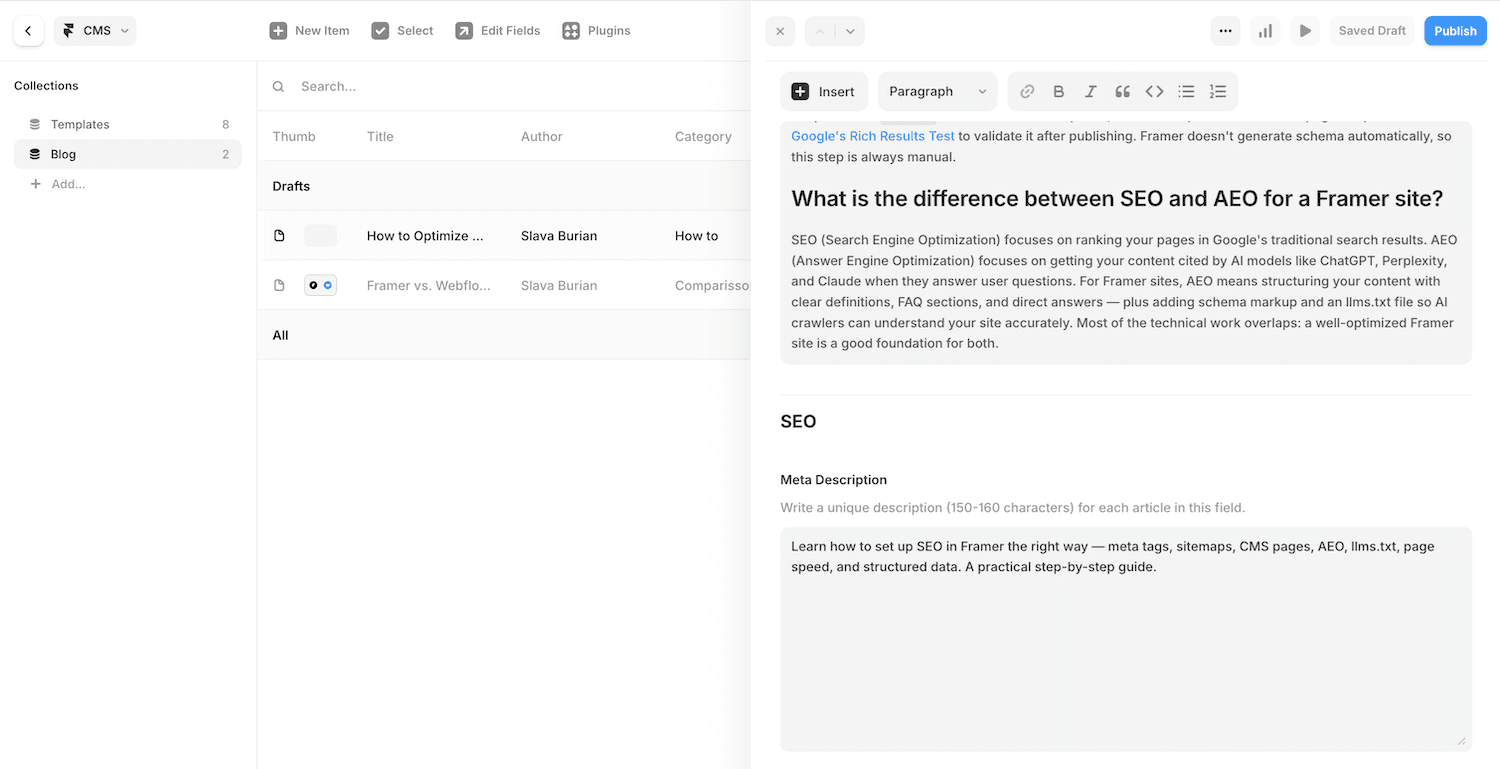
Setting Up SEO Fields in Your CMS Collection
Static page meta fields are set directly in the canvas — CMS pages work differently. Each collection item is its own page, so meta tags need to come from the CMS data, not be typed manually.
Open your CMS collection, go to Fields, and add three fields:
Title — the name of your blog post, case study, or product. This is what gets bound to the meta title, so write it as you'd want it to appear in search results.
Meta Description — a dedicated text field for the SEO snippet. Don't use the article body for this — it's too long and rarely optimized. A separate field gives you a place to write something intentional, under 155 characters.
OG Image — image field for social sharing previews.
Then open your collection page template in the Framer canvas. In the right panel, find the SEO section and bind each field to its corresponding CMS property. Every new collection item you create will automatically get its own unique meta tags — no manual editing per post.
This is the key difference from static pages: instead of typing values directly, you're connecting the SEO fields to data that lives in your CMS. The same principles apply — 50–60 characters for titles, under 155 for descriptions, 1200×630px for OG images — but the values come from your content, not the canvas.
Dynamic Meta Titles and Descriptions
Binding fields is the technical step. Writing them well is the content step.
Your SEO title should include the primary keyword for that specific piece of content — not your site name, not a generic label. If you're writing a case study about a fintech rebrand, the meta title should reflect that topic directly.
A reliable formula: [Primary Topic] — [Secondary Detail] | [Brand Name]
For descriptions, write one sentence that tells the reader exactly what they'll get from clicking. Treat it like a two-line pitch. It won't affect your ranking directly, but it affects whether someone clicks your result over the one above or below it.
Canonical Tags and Duplicate Content in CMS
The good news: Framer sets canonical tags automatically. Every page gets a canonical URL based on your connected custom domain. You don't need to add anything manually for standard setups.
If you need to customize the canonical URL — for example, if you're syndicating content to another platform or have the same content accessible via multiple domains — go to Settings → Domains → Canonical URL and set it there. This is a site-level setting, not something you need to handle page-by-page in custom code.
For most Framer sites, this requires zero action. Just make sure your custom domain is properly connected and Framer handles the rest correctly.
Page Speed and Core Web Vitals in Framer
Google uses Core Web Vitals as a ranking signal. They measure how fast your page loads, how stable the layout is, and how quickly it responds to user input.
Framer has a meaningful head start here. It renders pages server-side, hosts on a global CDN, and outputs clean React-based code. Most Framer sites score well on Core Web Vitals without any optimization at all.
But "good by default" isn't the same as "optimized." There are a few things worth checking.
Image Optimization in Framer
Images are the most common cause of slow load times. Framer serves images via its CDN and applies some automatic compression, but the format and dimensions you upload still matter.
Follow these rules:
Upload images at the size they'll be displayed — don't upload a 4000px photo for a 600px thumbnail
Framer automatically converts images to WebP and serves them from its global CDN.
Font Loading and Render-Blocking Resources
Custom fonts are a common performance issue that's easy to overlook. Every font weight you include adds an extra network request — and most designs use far fewer weights than get loaded.
Prefer Google Fonts over custom uploaded fonts. Framer has native support for Google Fonts — only the necessary character sets are downloaded, which keeps the file size small and load time fast. Custom fonts can still be performant, but they don’t benefit from the same level of automatic subsetting, so they should be used only when required by branding.
Only load the weights your design actually uses. If you're using Regular and Bold, you don't need Light, Medium, SemiBold, and Black. Audit your typography and cut anything that isn't referenced in your design.
The same logic applies to font families. Every additional typeface is another set of files the browser has to fetch before rendering text. Stick to one or two families across your site.
Animations can also affect Core Web Vitals, specifically Cumulative Layout Shift (CLS). If an animated element shifts other content when it loads or plays, Google counts that as a layout shift. Test your pages in PageSpeed Insights after adding animations to catch any issues early.
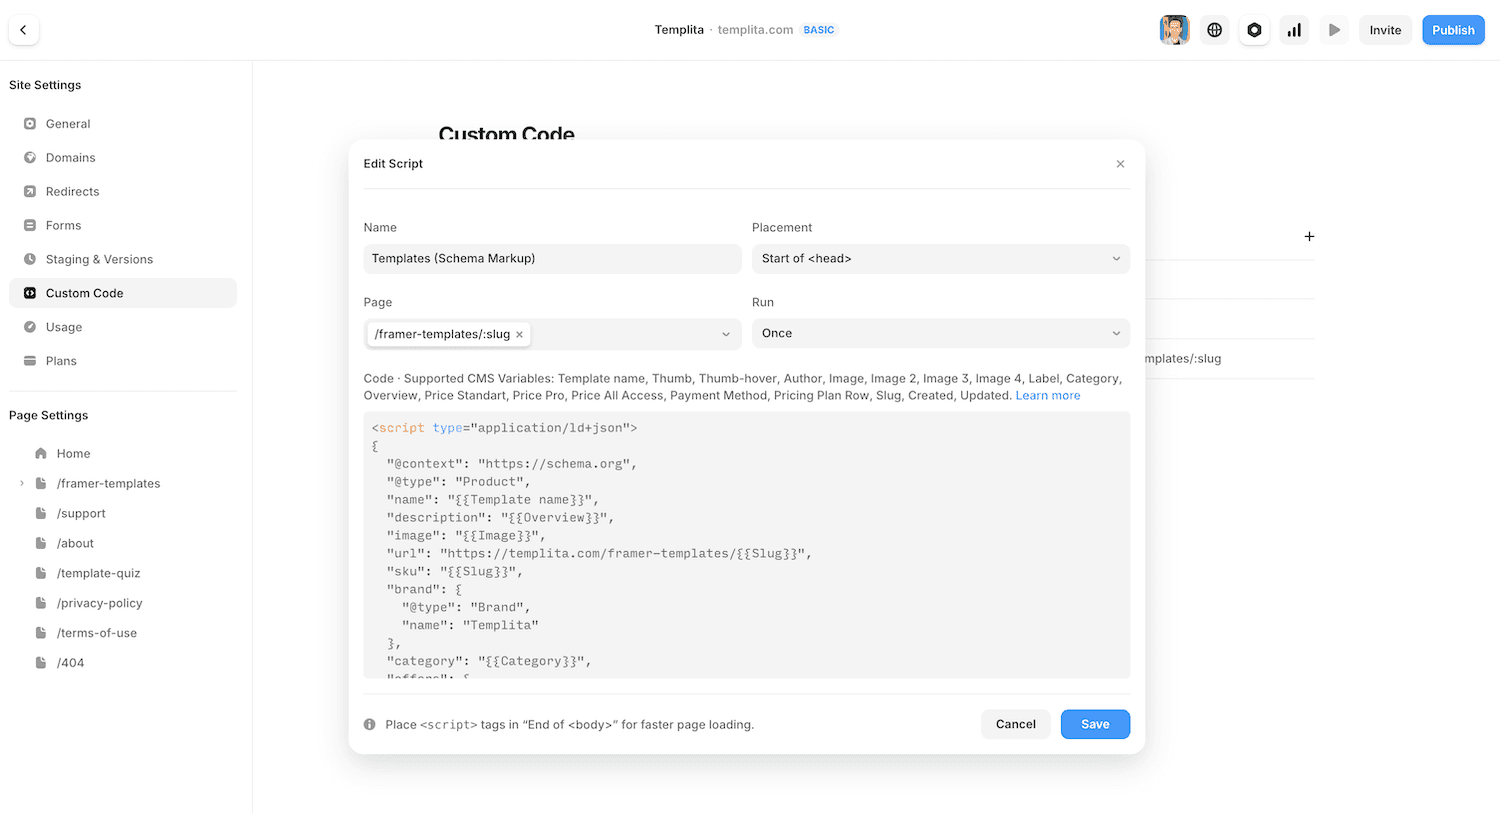
Advanced SEO in Framer — Custom Code and Structured Data
Framer's UI covers the basics. For everything beyond that, the custom code field is where you work.
Go to Site Settings → General → Custom Code. You'll see fields for code that runs in the <head> and code that runs at the end of the <body>. Most SEO additions go in the head.
Using the Custom Code Field for Schema Markup
Structured data (schema markup) helps Google understand the type of content on your page — an article, a product, an FAQ, a person. When implemented correctly, it can unlock rich results in search: star ratings, FAQ dropdowns, article dates, and more.
Framer doesn't generate schema automatically. You add it yourself as a JSON-LD script tag.
Here's a minimal example for a blog article:
Add this to the custom code field on your article template page. For CMS collections, you'll need to hardcode the values or use a workaround — Framer doesn't currently support binding CMS fields directly into custom code blocks.
For validating your structured data, use Google's Rich Results Test. Paste your URL and it will show you exactly what Google sees.
" height="40px" id="rjbK8FTRN" width="40px"/><path d="M 26.641 12.014 C 26.645 12.288 26.611 12.562 26.539 12.826 C 26.467 13.091 26.358 13.344 26.215 13.578 C 26.073 13.812 25.898 14.025 25.696 14.211 C 25.494 14.396 25.267 14.552 25.021 14.674 C 25.027 14.747 25.031 14.821 25.034 14.894 C 25.04 15.041 25.04 15.188 25.034 15.334 C 25.031 15.408 25.027 15.481 25.021 15.554 C 25.021 20.034 19.801 23.674 13.361 23.674 C 6.921 23.674 1.701 20.034 1.701 15.554 C 1.696 15.481 1.691 15.408 1.689 15.334 C 1.683 15.188 1.683 15.041 1.689 14.894 C 1.691 14.821 1.696 14.747 1.701 14.674 C 0.923 14.317 0.34 13.635 0.109 12.81 C -0.123 11.985 0.02 11.1 0.499 10.389 C 0.977 9.679 1.744 9.214 2.595 9.119 C 3.447 9.024 4.297 9.307 4.921 9.894 C 5.494 9.506 6.093 9.16 6.716 8.859 C 7.338 8.558 7.982 8.302 8.641 8.094 C 9.301 7.886 9.975 7.726 10.657 7.616 C 11.34 7.505 12.03 7.445 12.721 7.434 L 14.201 0.494 C 14.218 0.414 14.25 0.338 14.297 0.27 C 14.343 0.202 14.402 0.144 14.471 0.1 C 14.54 0.055 14.617 0.025 14.698 0.01 C 14.778 -0.005 14.861 -0.003 14.941 0.014 L 19.841 0.994 C 20.336 0.145 21.374 -0.219 22.29 0.135 C 23.207 0.489 23.731 1.456 23.526 2.417 C 23.321 3.378 22.448 4.048 21.467 3.998 C 20.486 3.947 19.686 3.191 19.581 2.214 L 15.301 1.314 L 14.001 7.554 C 14.684 7.569 15.366 7.633 16.04 7.745 C 17.389 7.97 18.699 8.389 19.93 8.988 C 20.544 9.287 21.136 9.63 21.701 10.014 C 22.107 9.624 22.618 9.36 23.171 9.254 C 23.724 9.147 24.296 9.203 24.819 9.414 C 25.341 9.626 25.791 9.984 26.114 10.445 C 26.438 10.906 26.621 11.451 26.641 12.014 Z M 6.793 14.78 C 6.894 15.022 7.041 15.243 7.227 15.428 C 7.413 15.614 7.633 15.761 7.876 15.862 C 8.118 15.963 8.378 16.014 8.641 16.014 C 9.45 16.014 10.179 15.527 10.489 14.78 C 10.799 14.032 10.627 13.172 10.055 12.6 C 9.483 12.028 8.623 11.857 7.876 12.166 C 7.129 12.476 6.641 13.205 6.641 14.014 C 6.641 14.277 6.693 14.537 6.793 14.78 Z M 18.248 19.581 C 18.351 19.481 18.409 19.344 18.411 19.201 C 18.413 19.058 18.358 18.92 18.258 18.817 C 18.158 18.715 18.021 18.656 17.878 18.654 C 17.735 18.652 17.597 18.708 17.481 18.794 C 17.18 19.01 16.862 19.2 16.529 19.362 C 16.196 19.524 15.85 19.658 15.495 19.761 C 15.14 19.865 14.777 19.938 14.409 19.981 C 14.041 20.023 13.671 20.034 13.301 20.014 C 12.932 20.031 12.562 20.016 12.196 19.97 C 11.829 19.924 11.467 19.847 11.114 19.74 C 10.76 19.633 10.416 19.496 10.086 19.331 C 9.755 19.166 9.439 18.973 9.141 18.754 C 9.038 18.669 8.906 18.626 8.772 18.632 C 8.638 18.639 8.512 18.695 8.417 18.79 C 8.322 18.885 8.266 19.011 8.259 19.145 C 8.253 19.279 8.296 19.411 8.381 19.514 C 8.733 19.779 9.106 20.013 9.498 20.214 C 9.889 20.415 10.298 20.582 10.718 20.713 C 11.138 20.844 11.568 20.938 12.005 20.996 C 12.441 21.053 12.882 21.072 13.321 21.054 C 13.761 21.072 14.201 21.053 14.638 20.996 C 15.512 20.881 16.36 20.617 17.145 20.214 C 17.536 20.013 17.91 19.779 18.261 19.514 Z M 17.881 16.174 C 18.152 16.177 18.421 16.125 18.672 16.021 C 18.922 15.916 19.149 15.762 19.338 15.568 C 19.527 15.373 19.674 15.142 19.771 14.889 C 19.868 14.636 19.912 14.365 19.901 14.094 C 19.901 13.285 19.414 12.556 18.667 12.246 C 17.919 11.937 17.059 12.108 16.487 12.68 C 15.915 13.252 15.744 14.112 16.053 14.86 C 16.363 15.607 17.092 16.094 17.901 16.094 Z" fill="rgb(255, 255, 255)" height="23.67435542905508px" id="Y4ODwRWeH" transform="translate(6.699 7.982)" width="26.64141108210045px"/></g></svg>)
"this ai search visibility data shows that using schema markup can lead to about 2x more citations, and llms.txt helps with category queries.. it highlights that content structure is becoming more important than domain authority. in many saas tests, structured faqs or lists have increased chatgpt mentions by about 30 to 40 percent"
AEO — Optimizing for AI Search Engines
SEO gets your pages ranked on Google. AEO — Answer Engine Optimization — gets your content cited by AI. When someone asks ChatGPT, Perplexity, or Claude a question, those models pull answers from the web. Which sites they cite depends on how clearly and confidently the content is written, and how easy it is for AI to parse.
This isn't a replacement for SEO. It's an additional layer — and for Framer sites, most of it builds directly on what you've already set up.
What AEO Is and How It Differs from SEO
Traditional SEO optimizes for ranking — you want to appear at position 1 in a list of ten blue links. AEO optimizes for citation — you want your content to be the source an AI model quotes when answering a specific question.
The key difference: Google ranks pages. AI models extract answers.
Google looks at domain authority, backlinks, and on-page signals. AI models look for content that directly answers a question, uses clear and confident language, and is structured in a way that's easy to parse — short definitions, FAQ-style sections, explicit conclusions.
A page optimized only for traditional SEO might rank well but get ignored by AI. A page optimized for AEO gives direct, quotable answers that AI models can lift and cite accurately.
How to Structure Content for AI Answers
AI models prefer content that answers questions explicitly — not content that circles around a topic for 800 words before getting to the point.
Apply these structural principles to your Framer pages and CMS posts:
Lead with the answer. State the direct answer in the first 1–2 sentences of each section, then expand. Don't bury the conclusion at the end.
Use FAQ sections. A clearly marked FAQ with question-as-heading and a concise answer below is one of the most cited content formats in AI responses. Add one to your key pages.
Write clean definitions. If you're explaining a concept, define it in one sentence before elaborating. "Framer SEO is the process of configuring Framer's built-in tools and custom code to make your site readable and rankable by search engines." That's a citable sentence. A paragraph of context isn't.
Use specific numbers and facts. AI models prefer concrete claims over vague ones. "Meta descriptions should be under 155 characters" is more citable than "keep your meta description reasonably short."
llms.txt and Structured Data as AEO Foundations
Two things you've already set up in this guide directly support AEO — and it's worth understanding why.
llms.txt gives AI crawlers a clean map of your site before they even touch your individual pages. When a model is deciding which sources to trust, a site with a well-structured llms.txt signals that the owner understands how AI indexing works — and has made their content intentionally accessible.
Structured data (JSON-LD) does the same thing at the page level. When you mark up an article with @type: Article, a FAQ with @type: FAQPage, or a how-to guide with @type: HowTo, you're telling both Google and AI crawlers exactly what kind of content is on the page. AI models that support structured data can extract answers more accurately from pages that use it.
Together, llms.txt and schema markup form the technical foundation of an AEO-ready Framer site. If you've followed this guide up to this point, you already have both in place.
Conclusion
Framer gives you a cleaner SEO foundation than most website builders. Server-side rendering, automatic sitemaps, a global CDN — these aren't small things. Most platforms charge extra for what Framer does by default.
But the foundation doesn't rank your site. You do.
The highest-impact things you can do right now:
Set unique meta titles and descriptions on every page — not just the homepage
Add SEO fields to your CMS collections and bind them to your page templates
Verify your site in Google Search Console and submit your sitemap
Run your pages through PageSpeed Insights and fix any image or font issues
Add JSON-LD schema to your article or product templates
Set up 301 redirects whenever you change a URL
Upload an llms.txt file via Well-known files
None of these steps require a developer. They require attention and about two hours on a new project.
The biggest mistake Framer users make with SEO isn't a technical one — it's treating SEO as something to handle after launch. By then, you're already behind. Build it into your project setup, the same way you set up your typography or your color styles.
Do it once, do it right, and your site will be in better shape than the majority of Framer sites currently in Google's index.
Frequently Asked Questions
Is Framer good for SEO?
Yes. Framer handles several technical SEO requirements automatically — server-side rendering, HTTPS, a global CDN, and an auto-generated sitemap. Most Framer sites score well on Core Web Vitals without any extra optimization. What Framer doesn't do automatically is write your meta tags, set up structured data, or connect your site to Google Search Console. Those are your responsibility, and this guide covers all of them.
Does Framer generate a sitemap automatically?
Yes. Every time you publish your Framer site, it regenerates a sitemap at yourdomain.com/sitemap.xml. It includes all published pages and CMS collection items. You don't need to create or update it manually — just submit the URL once to Google Search Console and Google will keep re-crawling it as you publish new content.
How do I add meta tags to a Framer CMS collection?
Open your CMS collection, go to Fields, and add a text field called "SEO Title" and another called "SEO Description." Then open your collection page template in the Framer canvas, find the SEO section in the right panel, and bind each field to its corresponding CMS property. From that point, every new collection item automatically gets its own unique meta tags based on whatever you write in those fields.
Can I add structured data (schema markup) to a Framer site?
Yes, via the custom code field. Go to Site Settings → General → Custom Code and paste your JSON-LD script into the <head> block. For article templates, add the script to the collection page template. Use Google's Rich Results Test to validate it after publishing. Framer doesn't generate schema automatically, so this step is always manual.
What is the difference between SEO and AEO for a Framer site?
SEO (Search Engine Optimization) focuses on ranking your pages in Google's traditional search results. AEO (Answer Engine Optimization) focuses on getting your content cited by AI models like ChatGPT, Perplexity, and Claude when they answer user questions. For Framer sites, AEO means structuring your content with clear definitions, FAQ sections, and direct answers — plus adding schema markup and an llms.txt file so AI crawlers can understand your site accurately. Most of the technical work overlaps: a well-optimized Framer site is a good foundation for both.
More Articles
Explore More Articles
Discover other Guides & Tips for Framer Websites